Observium: Configuring Microsoft Windows 2008 Server SNMP Agent
1. Open Control Pannel.
3. Expand “SNMP Services” and select “SNMP Service” click
Next
4. Click Install
5. Close Programs & Features”
6. Open Ädministraive Tools and clicket Services
7. Expand Configuration and select Services, Select SNMP Service, right click and select properties
8. Select the “Agent” tab
9. Type the contact name responsible for this server or
email address
10. Type the location eg, Hyderabad,India.
11. Tick the following
- Physical
- Datalink and subnetwork
- SNMP Trap Service - Agent
12. Select the “Traps” tab
13. Type in the community string you are using in your
environment and select “Add to list”
14. Click “Add”
15. Type the IP of the Observium ServerSNMP Trap Service
- Traps
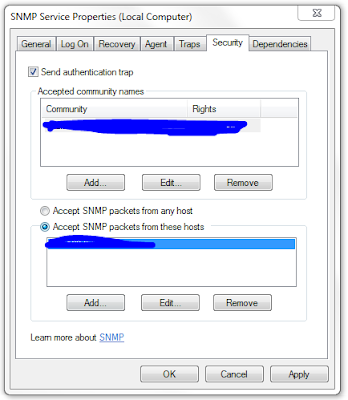
16. Select “Security” tab
17. Ensure “Send authentication trap” is ticked
18. Click “Add” under “Accepted community names”
19. Select “READ CREATE” under Community rights
20. Enter your community string under Community Name
21. Select “Accept SNMP packets from these hosts”
22. Select “Add” and type the IP address of the Observium
Server
You can also put in the FQDN of the Observium serverSNMP
Trap Service - Security
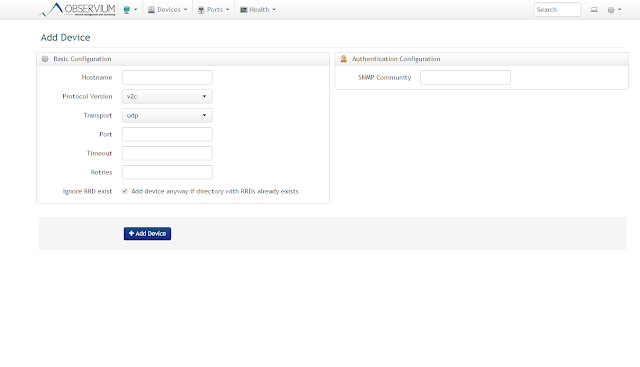
23. Add your server into the Observium Web Console
Keywords: Windows Client for Observium, SNMP Services, SNMP Client, Monitoring Windows Client


Comments
Post a Comment